I’m in the midst of a big framing job—a polyptych of four abutted cassetta frames in quartersawn white oak to house a 17th century map in four panels.
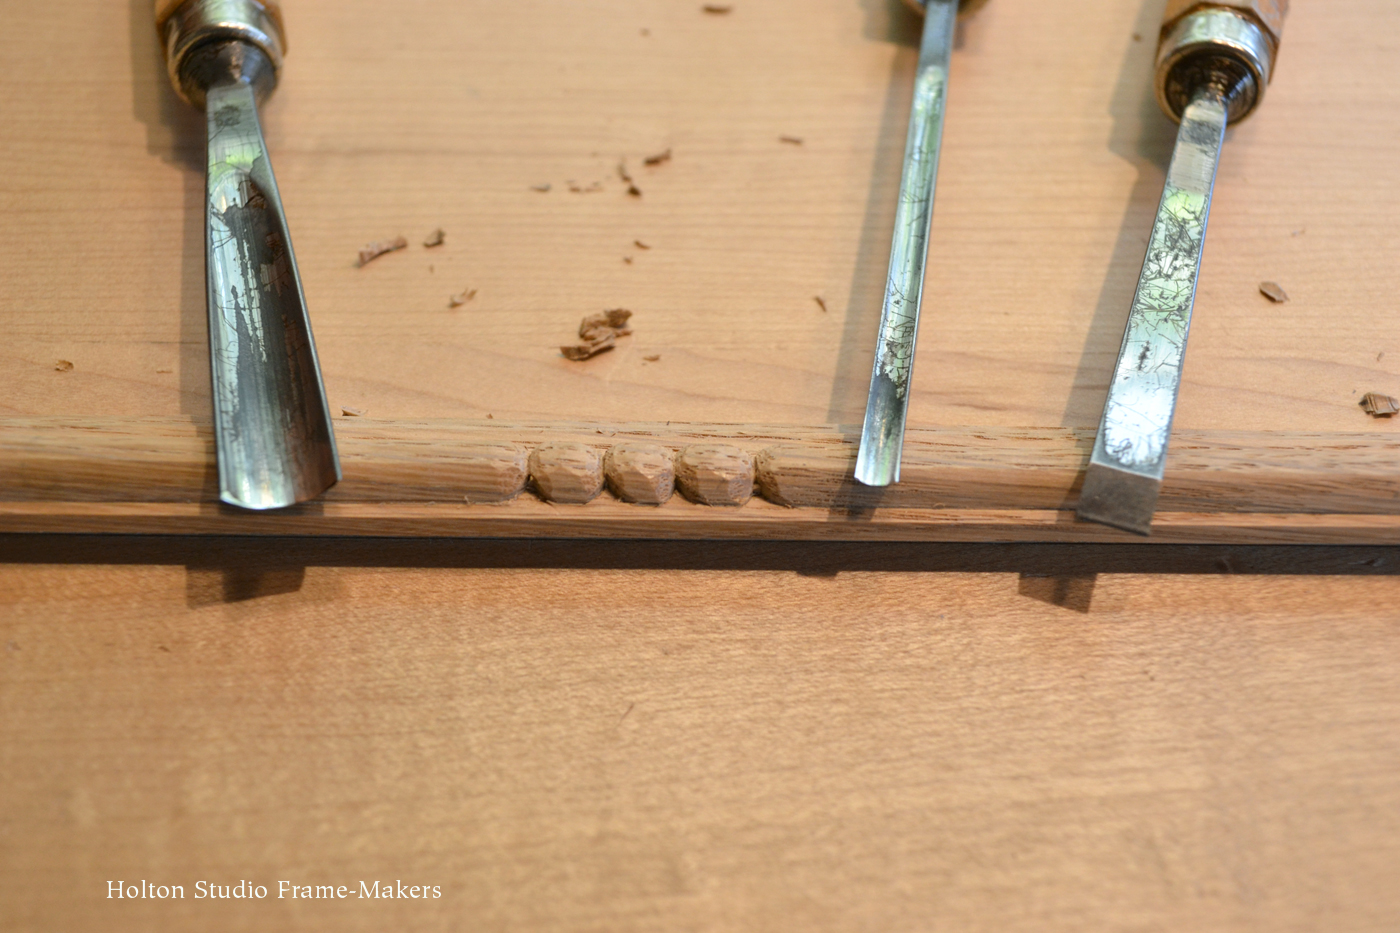
A set of beads with the three basic carving chisels used.
Helping unify them is a sight edge molding with a running beaded pattern. Beads are part of the basic vocabulary of frame design. The pattern here—taken from the border of the maps—has three beads in a set, the sets spaced a few inches apart. The whole polyptych is about 15 feet long, so the beaded molding has 234 beads.
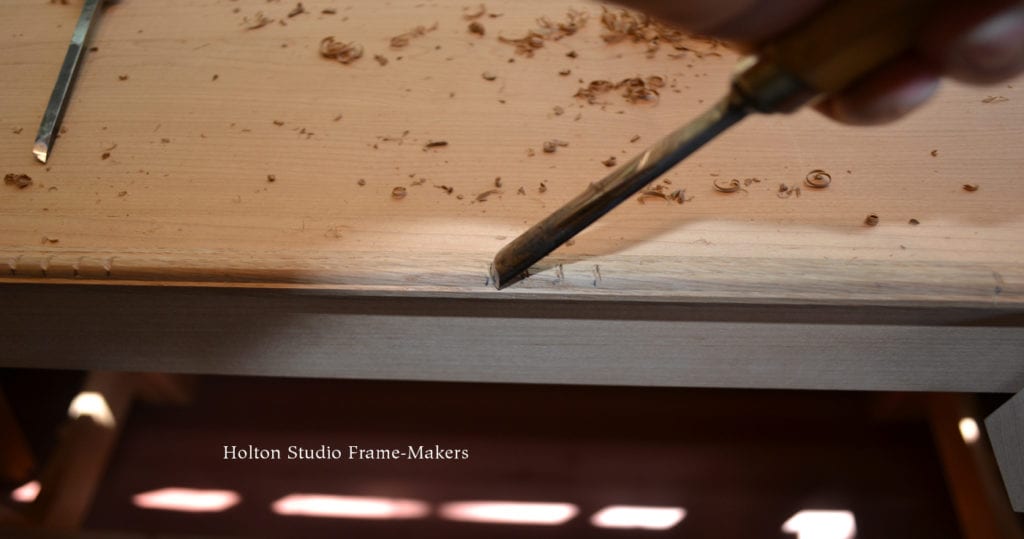
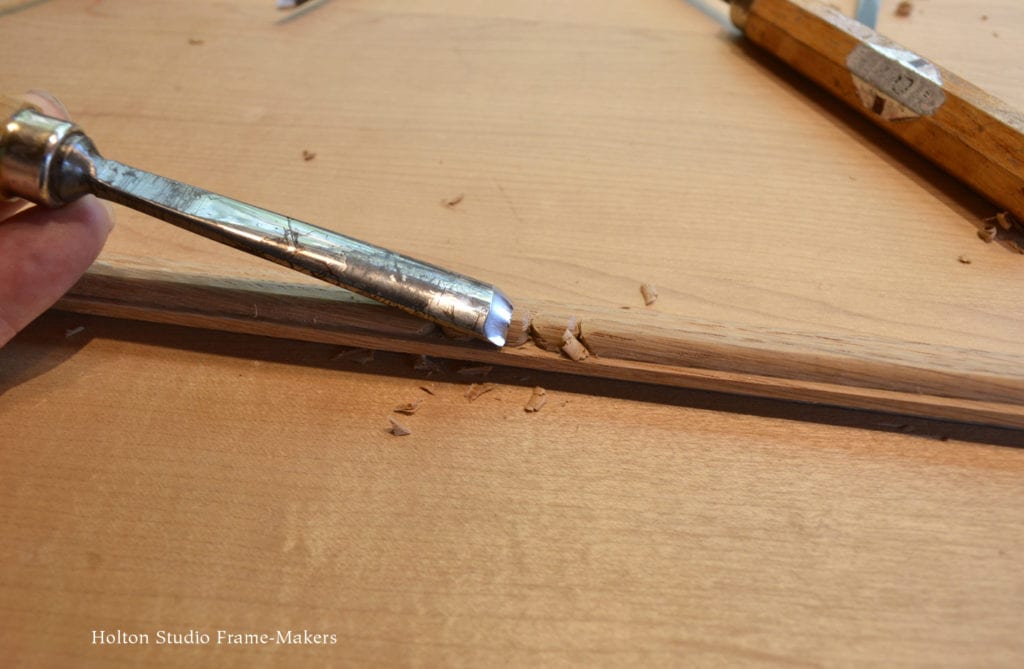
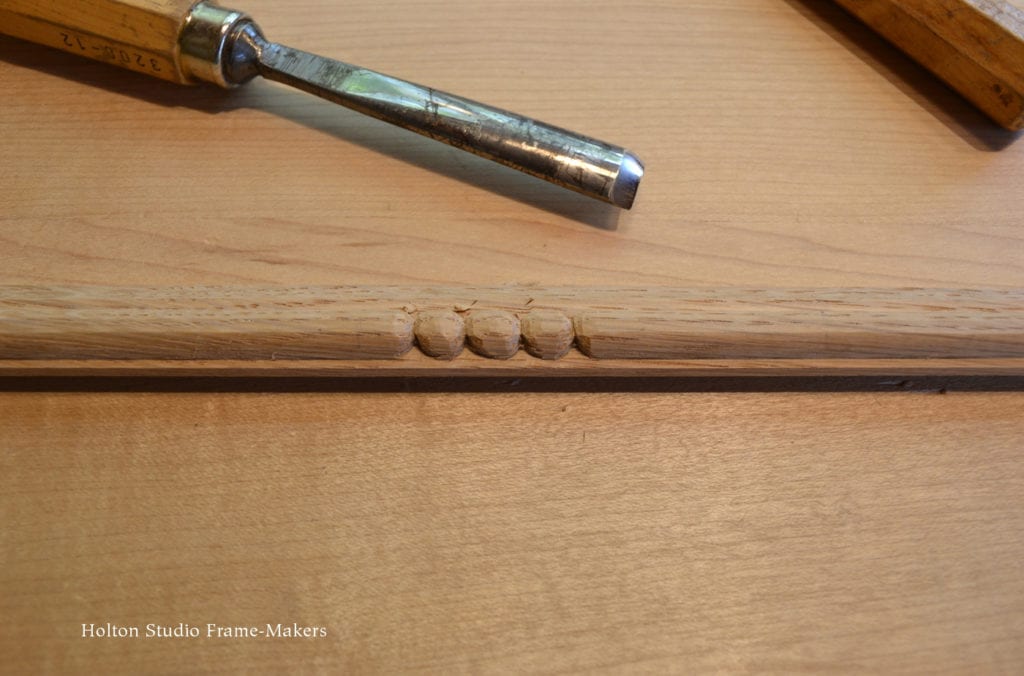
The first two steps, which aren’t shown, are, 1) selecting the wood, which is crucial to the ease of carving, especially in a coarse wood like quartersawn white oak; and 2) milling the shape, which is a 5/16″ wide bead with a narrow cove (see first photo below). Also critical to carving is keeping the tools sharp.
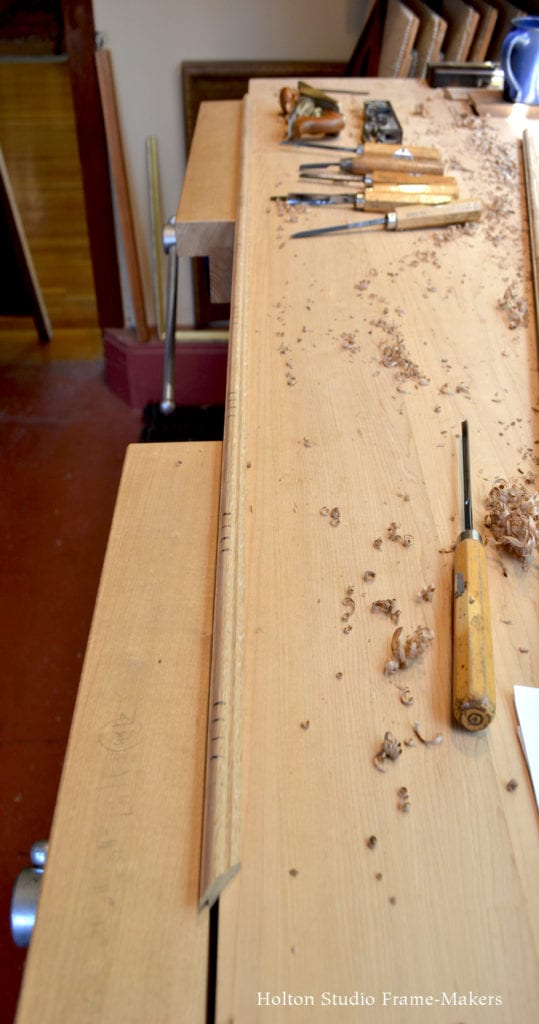
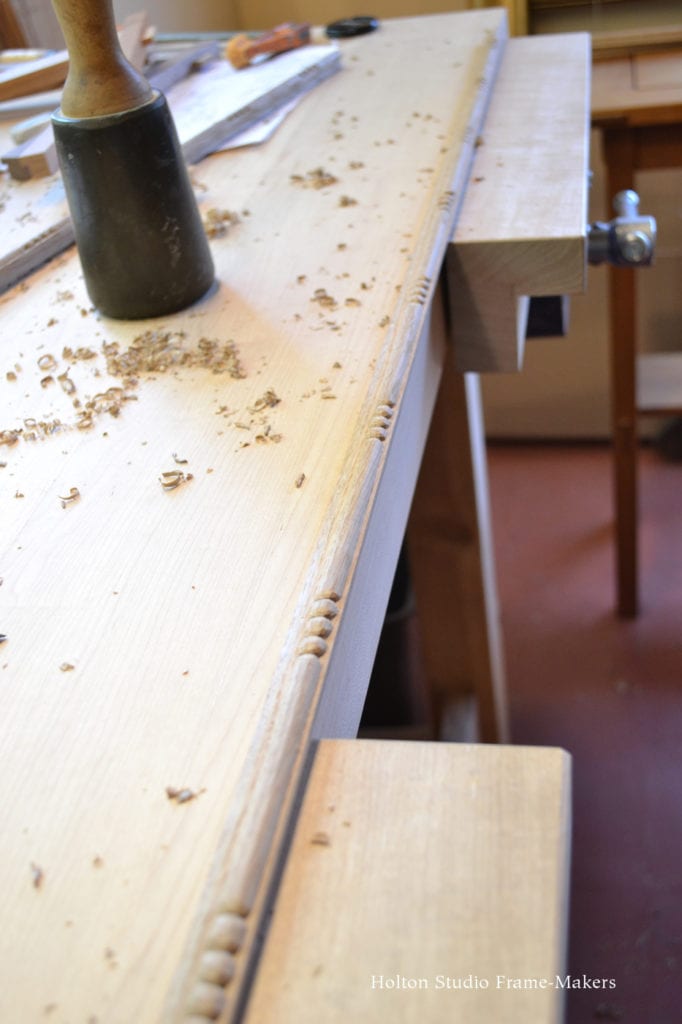
My bench, which I discussed a bit in my recent post, “Tools of the Trade,” but is more visible here, is designed for exactly this kind of work. It has two front-mounted vises with especially wide and long jaws for holding lengths of molding and providing a wide surface to rest my hands on, which is necessary to proper control.
Here’s how beads are carved.
-
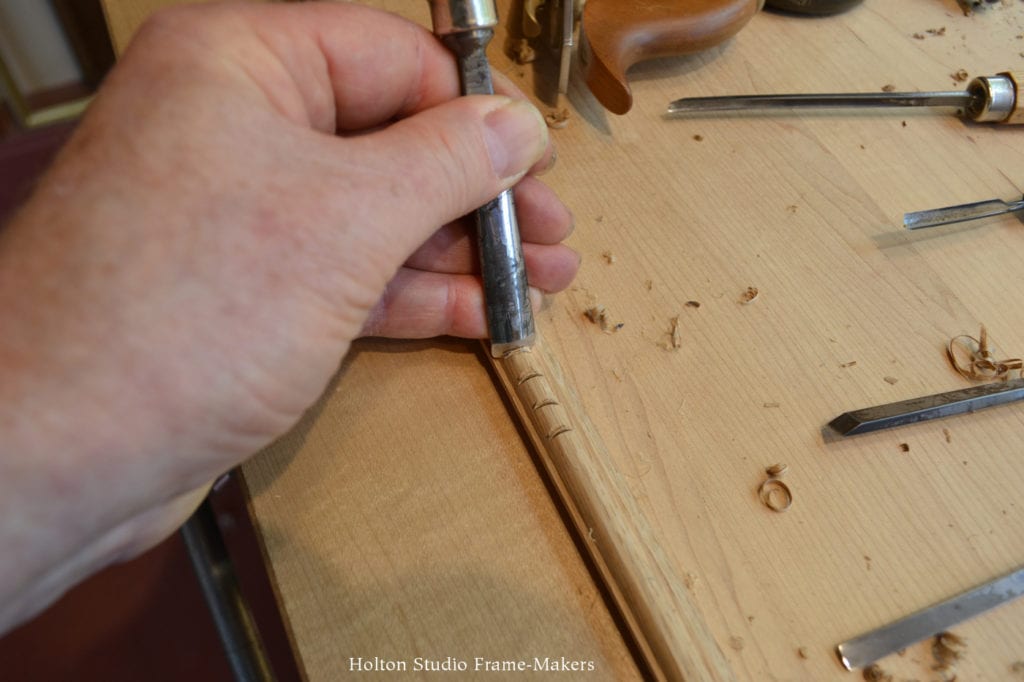
- The molding is clamped in the vises, and spacing of the beads is marked out.
-
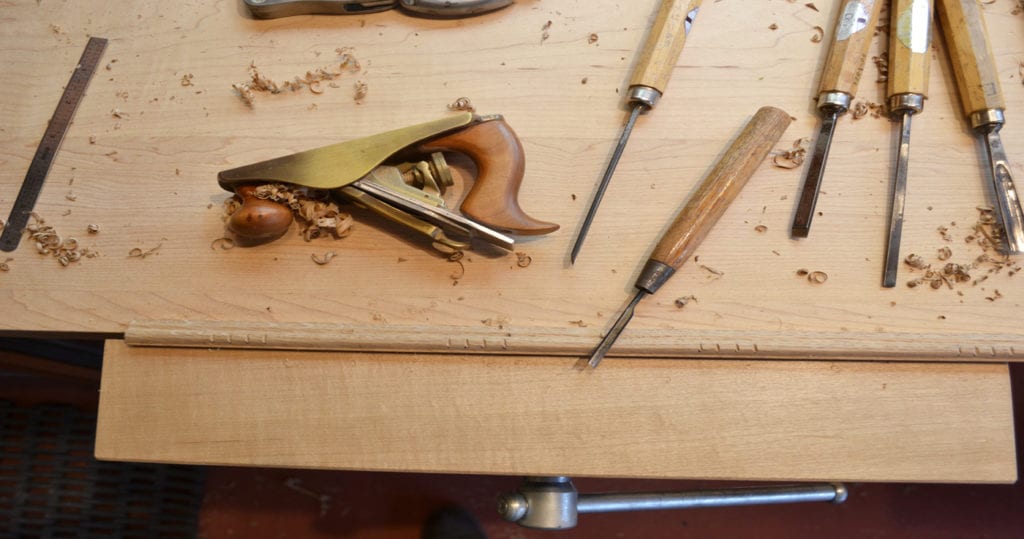
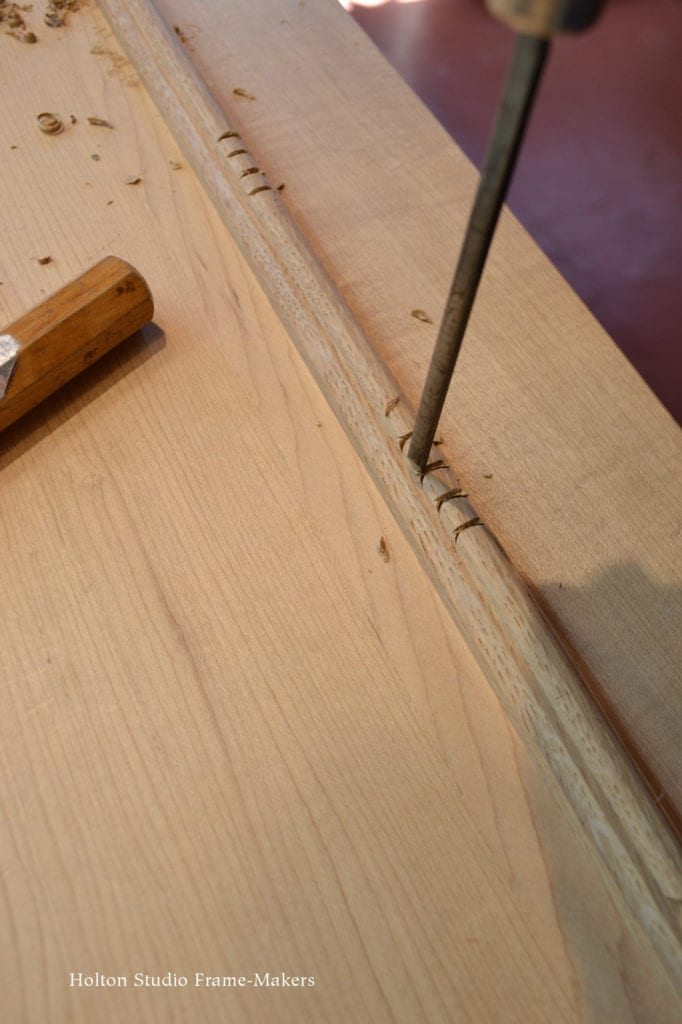
- With a v-tool, I cut on my lines across the grain. This helps to keep the wood from chipping out during the next step.
-
- With a gouge, I cut in at about a 45 degree angle to the valley between the beads, first from one side…
-
- …Then from the other. By the way, these first cuts are the only ones for which I use a mallet.
-
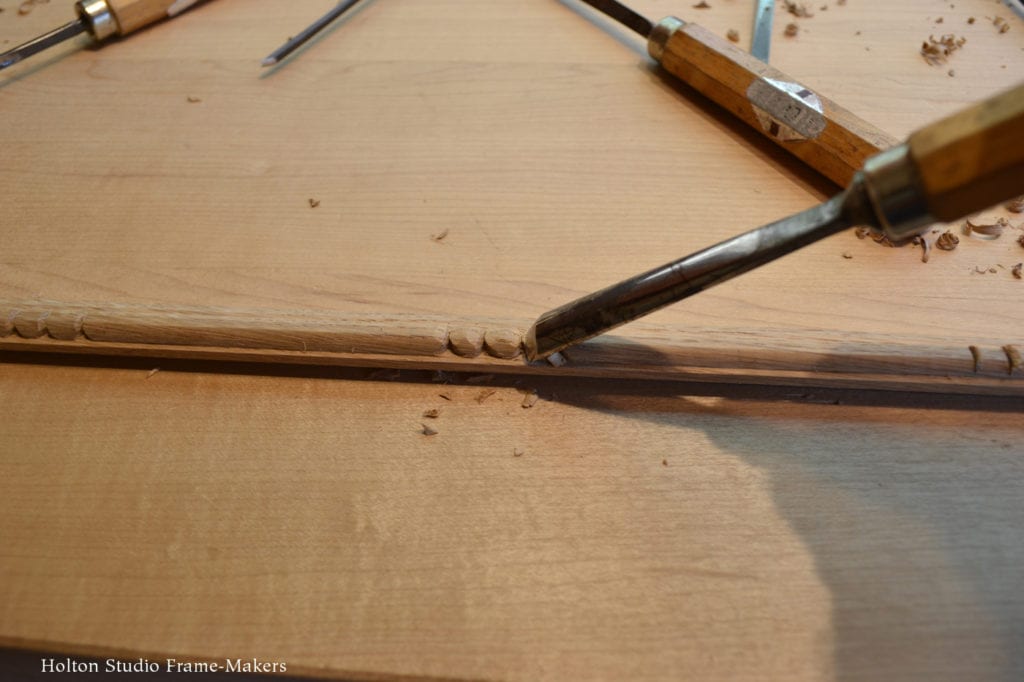
- The V between the sides of the beads is cut with a smaller gouge.
-

- Clearing out the side V’s with a firmer chisel.
-
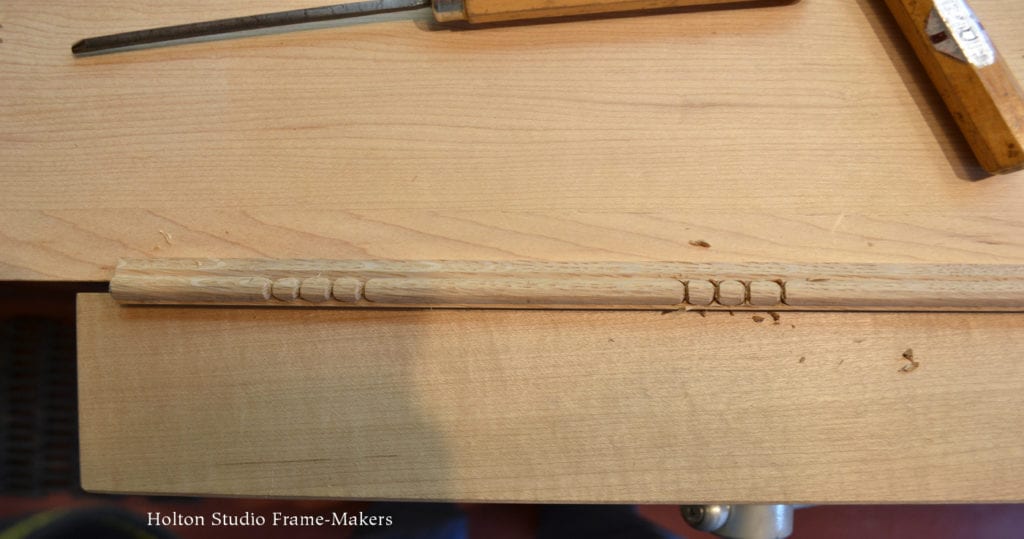
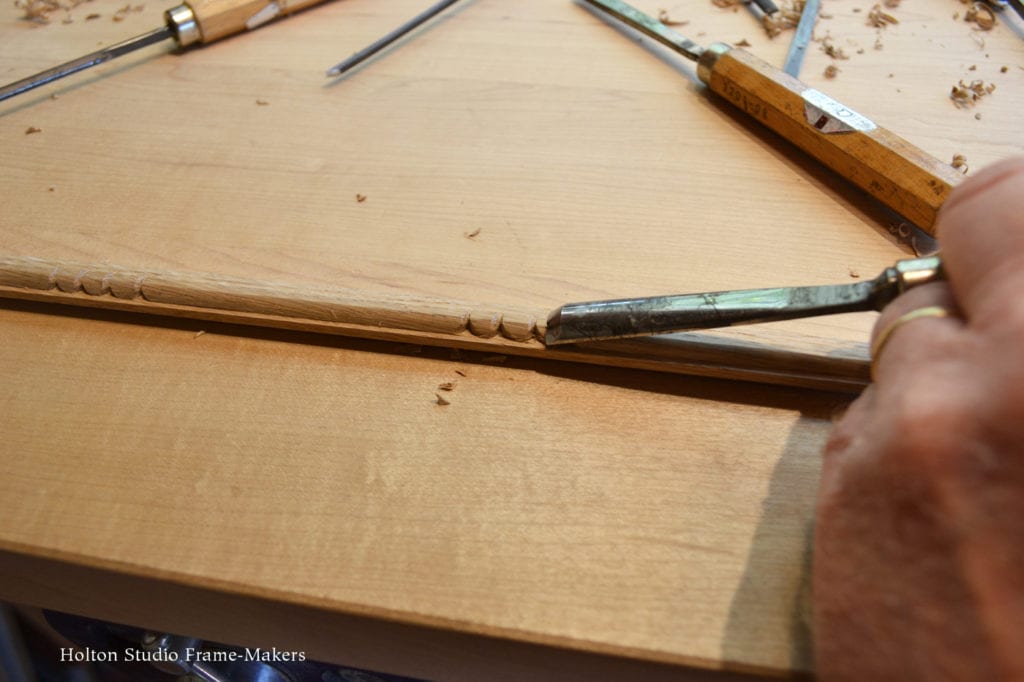
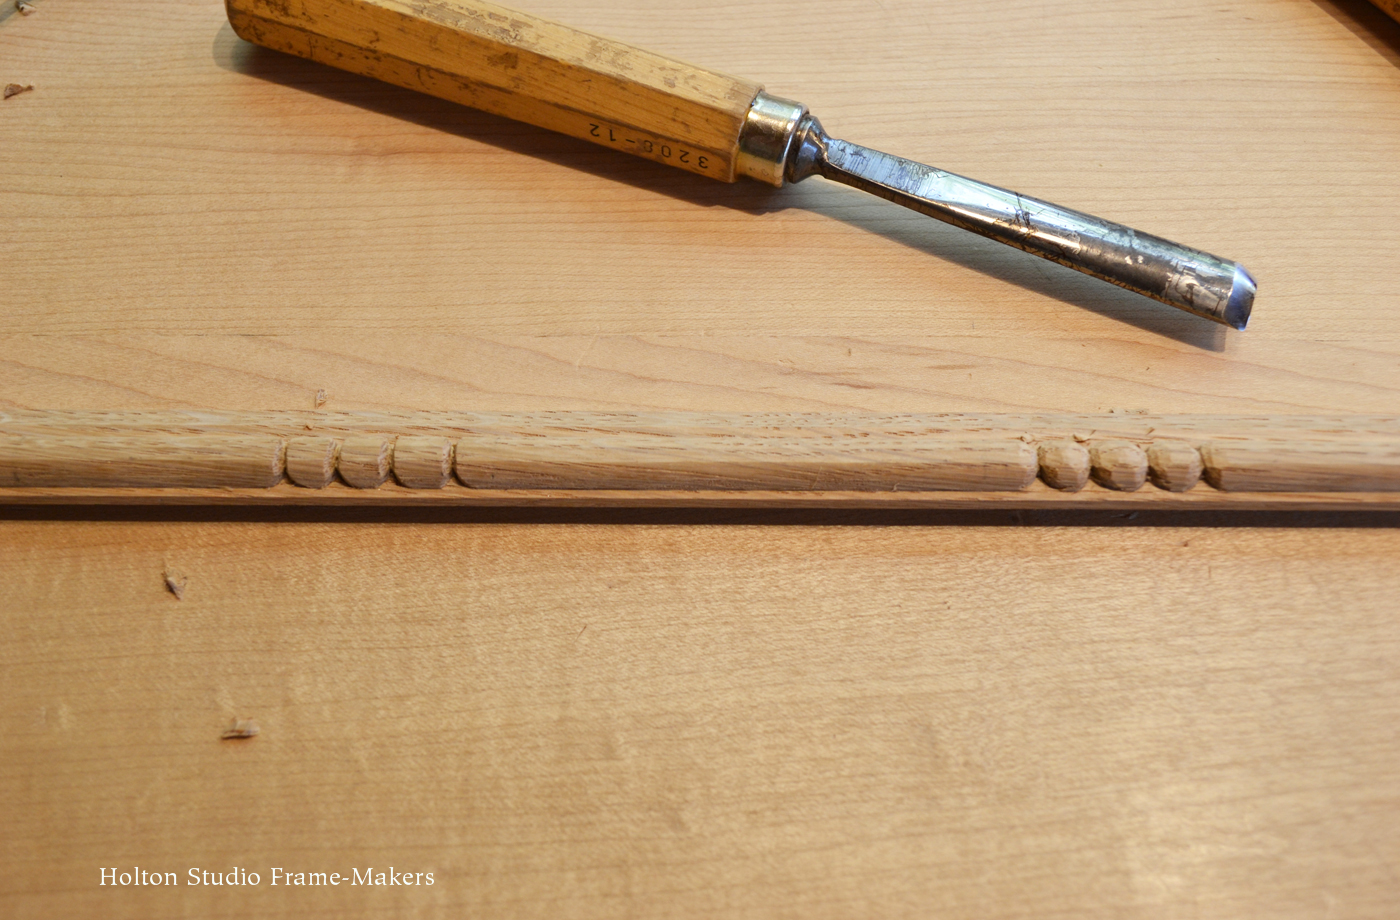
- Two sets of beads before (right) and after (left) that step. Now the beads are ready to shape into hemispheres. View large…
-
- Rounding the tops of the beads.
-
- This low angle is the first of two cuts in shaping the tops.
-
- The second cut to round the tops is at a steeper angle.
-

- Tops are rounded. View large…
-
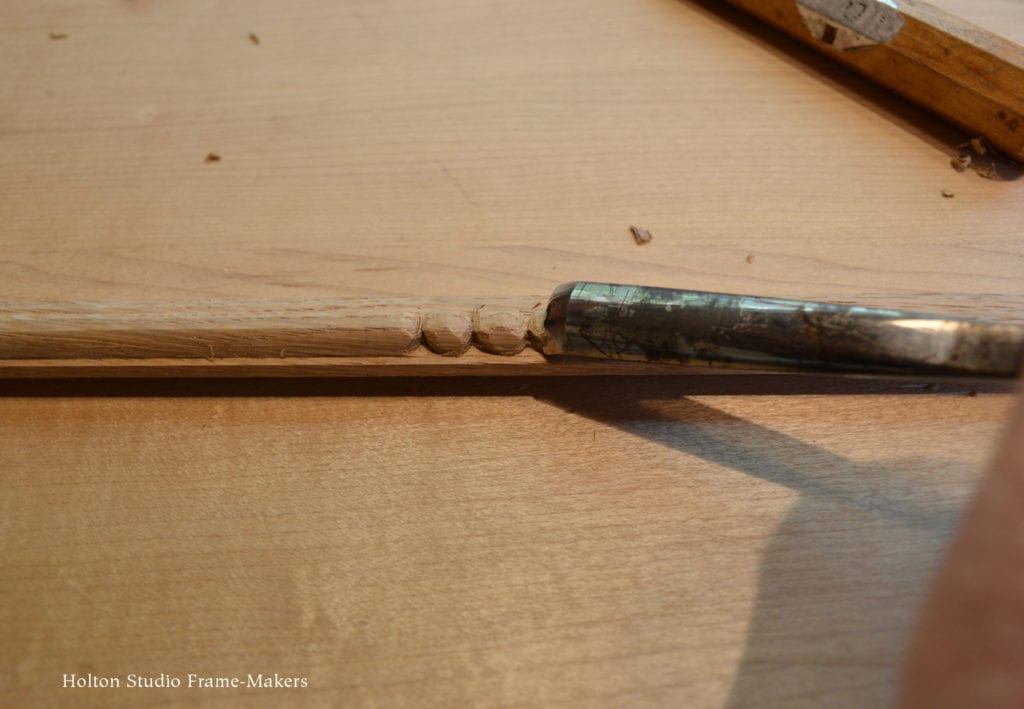
- Rounding off down the sides.
-

- Before and after rounding off. View large…
-
- A finished set of beads.
-

- Four of the eight 42″ lengths.
-
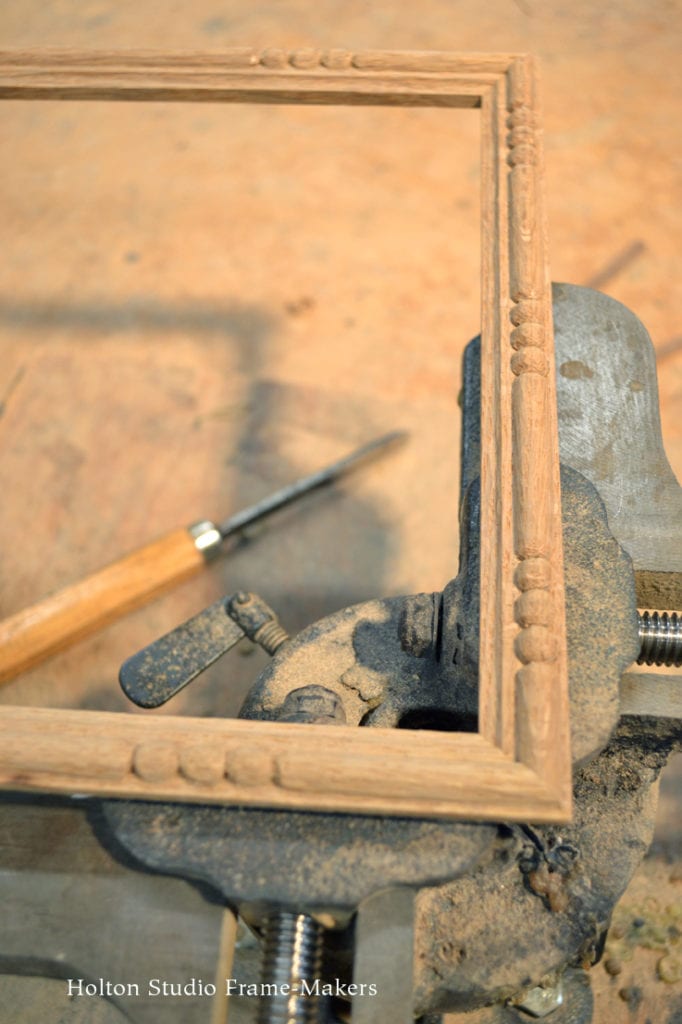
- In the vise.
Final note: For efficiency, each cut should be done in multiples, going down sequentially the length of the molding—or at least each set of beads. I tended to do the first three cuts (the v-tool cutting across the grain, and the two initial cuts into the valleys between the beads) down the whole length of molding, and after that focus on each set of beads, but still doing each cut in sequence on the full set of beads. With that approach, each set takes about five minutes.
Additional posts on this project—
A post on carving the cap molding, gluing up the frames, and finishing them is here. The final post showing the finished project is here.
« Back to Blog
Hi Tim,
This was fascinating, I would love to see the finished frame(s) when you are finished if that is possible. You are such a talented frame maker, balancing the artwork and framing with such sensitivity!
Thank You for sharing this!
John Kraft
Thank you, John. I’m sure I’ll be posting the finished job.
Good to hear from you!
Tim
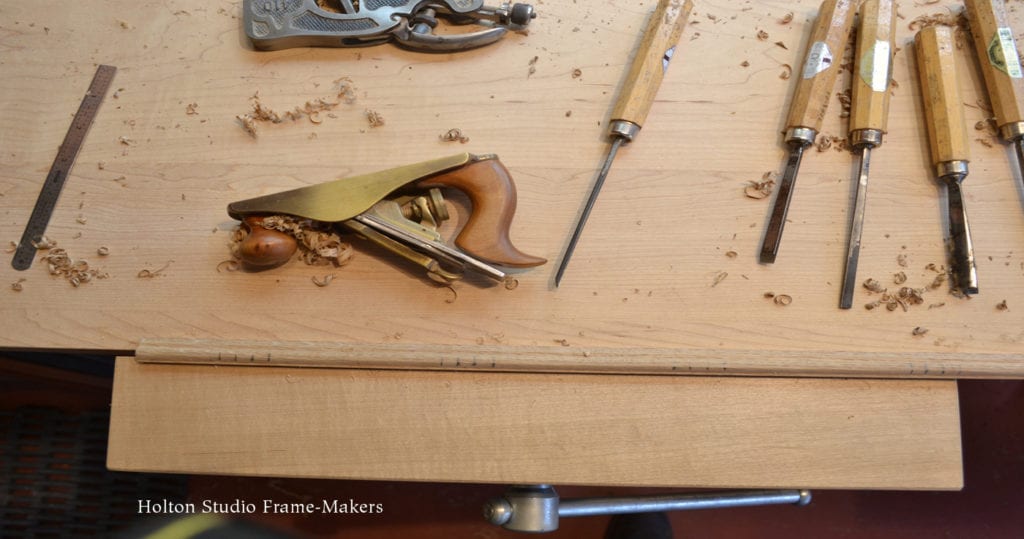
In the next to last picture with the caption: Four of the eight 42″ lengths. Is that plane laying on its side by any chance the plane you used to form the bead? thanks — John
No, that’s a rabbet plane. I used a molding head on the table saw to form the bead and the cove. I use a rabbet plane to get the mill marks out of the narrow filets on either side of the bead.
Thanks Tim, that’s what I suspected. I use Veritas small plow plane with bead cutters on some of my frames but they don’t have that radius. I picked up an old Stanley weatherstrip plane and am thinking of trying to shape the cutter to cut beads but ….. router table better choice!